Difference between revisions of "STM32 LED Blink"
imported>Lth |
imported>Lth |
||
| Line 10: | Line 10: | ||
[[File:Stm32CubeMX Sys Settings.png|400px]] | [[File:Stm32CubeMX Sys Settings.png|400px]] | ||
| + | |||
| + | Second step is to configure the CPU to enable the external crystal: | ||
| + | |||
| + | [[File:Stm32CubeMx crystal setting.png|400px]] | ||
| + | |||
| + | Final step is to configure the various clocks: | ||
| + | |||
| + | [[File:Stm32CubeMx clock.png|800px]] | ||
== Main Loop With Delay == | == Main Loop With Delay == | ||
Th | Th | ||
Revision as of 03:17, 1 November 2020
When learning a new programming language, programmers often - if not always - begin with a humble "hello world" application, which will print "Hello World!" on the display. As common as that, when it comes to embedded programming (where a display might not be available) a typical "first application" is one which will blink a led. And for this reason, most development boards comes with one or more leds which can be controlled with a GPIO pin.
In this article, I will be using my own Green Pill development board, which for all intents and purposes is comparable to the common Blue Pill. The board is based on an STM32F103 processor, includes a 8 MHz external crystal and has got a led attached to the PC13 GPIO pin.
Common Settings
For these examples, I will be using ST's Stm32CubeIde, which includes Stm32CubeMx. Stm32CubeMx is used to "configure" the processor.
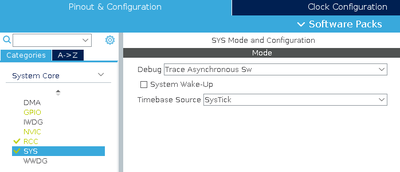
When starting a new project in Stm32CubeIde, I generally go through some common settings. First step I configure the Serial Wire debug (including the trace):
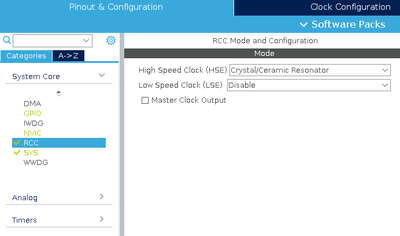
Second step is to configure the CPU to enable the external crystal:
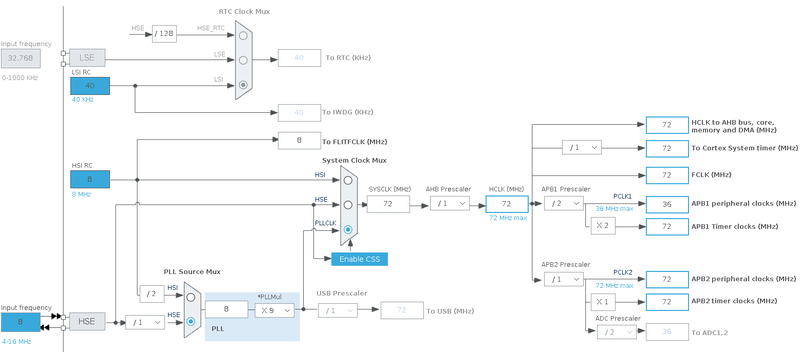
Final step is to configure the various clocks:
Main Loop With Delay
Th


