Difference between revisions of "STM32 CAN"
Jump to navigation
Jump to search
| Line 6: | Line 6: | ||
== Loopback Example == | == Loopback Example == | ||
| + | The [[CAN]] peripheral on [[STM32]] MCU's can be configured to run in loopback mode. This makes it possible to test CAN programming without actually hooking the device up to a physical CAN bus. | ||
| − | + | The source for this example is here: [https://github.com/STM32World/firmware/tree/master/mcustm32f405_can_loopback https://github.com/STM32World/firmware/tree/master/mcustm32f405_can_loopback] | |
| − | The source for this example is here: [https://github.com/STM32World/firmware/tree/master/mcustm32f405_can_loopback] | ||
=== CubeMX Config === | === CubeMX Config === | ||
Revision as of 13:08, 23 December 2023
Introduction
Most STM32 MCUs are equipped with one or more CAN peripherals.
Loopback Example
The CAN peripheral on STM32 MCU's can be configured to run in loopback mode. This makes it possible to test CAN programming without actually hooking the device up to a physical CAN bus.
The source for this example is here: https://github.com/STM32World/firmware/tree/master/mcustm32f405_can_loopback
CubeMX Config
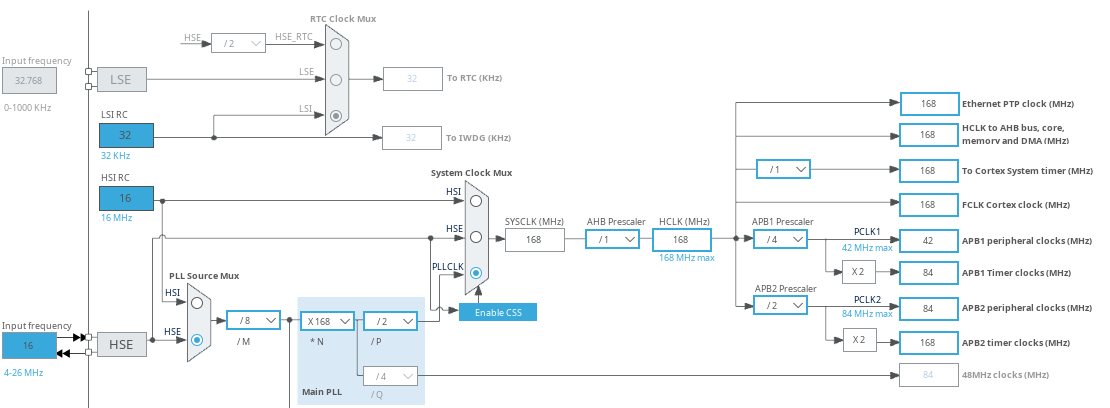
The clock is configured to maximum speed using the external crystal:
Notice the APB1 bus is running at 42 MHz. The CAN peripherals are connected to this bus.
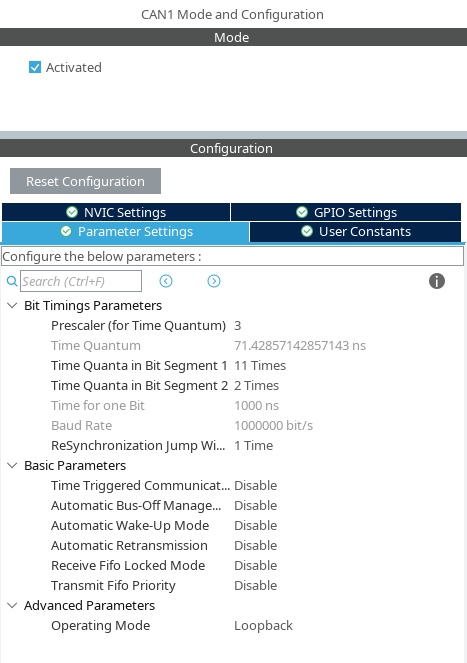
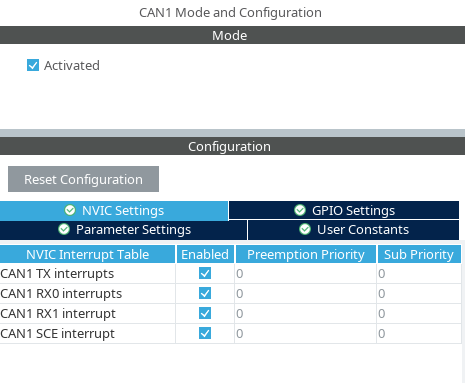
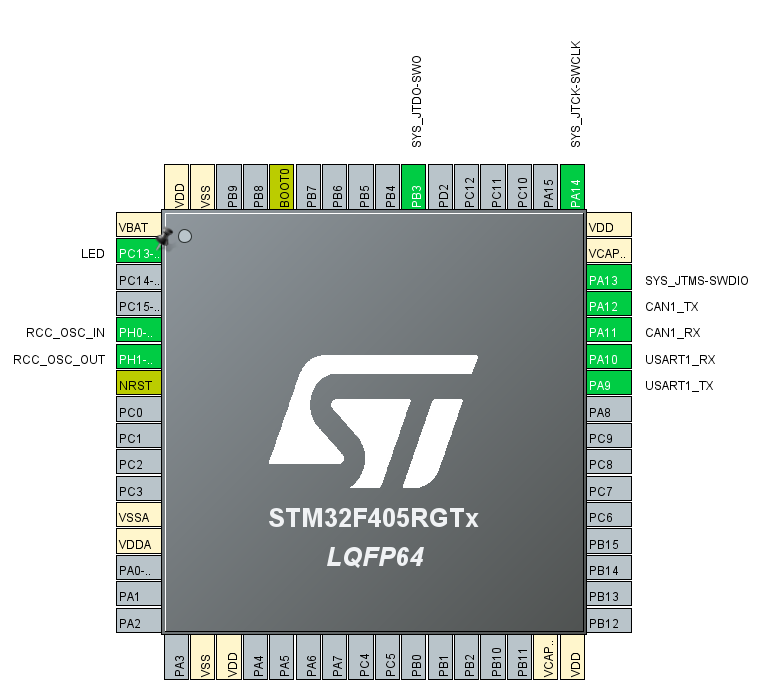
We can now configure the CAN1 periopheral:

|

|
Real CAN bus example
To be added
Miscellaneous Links
To be added

