STM32 development and debugging using VSCode
ST provide an IDE (Integrated Development Environment) for STM32 development. As a beginner's environment to learn embedded programming on STM32 MCUs this IDE is not half bad.
Prerequisites
This example is developed on a standard Debian desktop system. On an Ubuntu system it should be almost the same.
Toolchain
The toolchain refers to the compiler and the tools to manipulate binary images. On Debian those are available in the standard repository:
$ sudo apt install gcc-arm-none-eabi binutils-arm-none-eabi
GNU Debugger (GDB)
The GNU Debugger (GDB) is also available:
$ sudo apt install gdb-multiarch
OpenOCD
To communicate with the actual STM32 MCU a JTAG/SWD tool is necessary. Fortunately the standard OpenOCD in Debian support STM32/ST-Link:
$ sudo apt install openocd
STM32CubeMX
STM32CubeMX can be downloaded directly from ST's Website.
Visual Studio Code
The final prerequisite will be VSCode itself. On a Debian system, the easiest way to install VSCode is to use the repository provided by Microsoft. In my case, I've added the repository:
lth@ncpws04:~$ sudo cat /etc/apt/sources.list.d/vscode.list
deb [arch=amd64,arm64,armhf] http://packages.microsoft.com/repos/code stable main
Having that added, installation becomes a simple matter of:
$ sudo apt update && sudo apt install code
After installing VSCode a few extensions need to be installed. Those are:
- C/C++ Extension
- Cortex-Debug
- Makefile Tools
Starting a project with STM32CubeMX
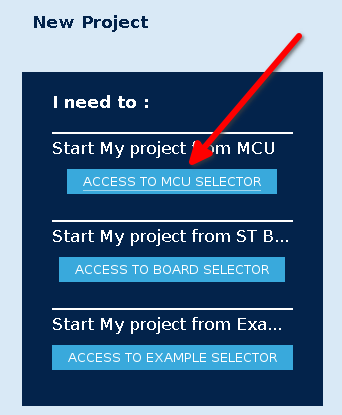
When starting STM32CubeMX we can select "Access to MCU Selector":
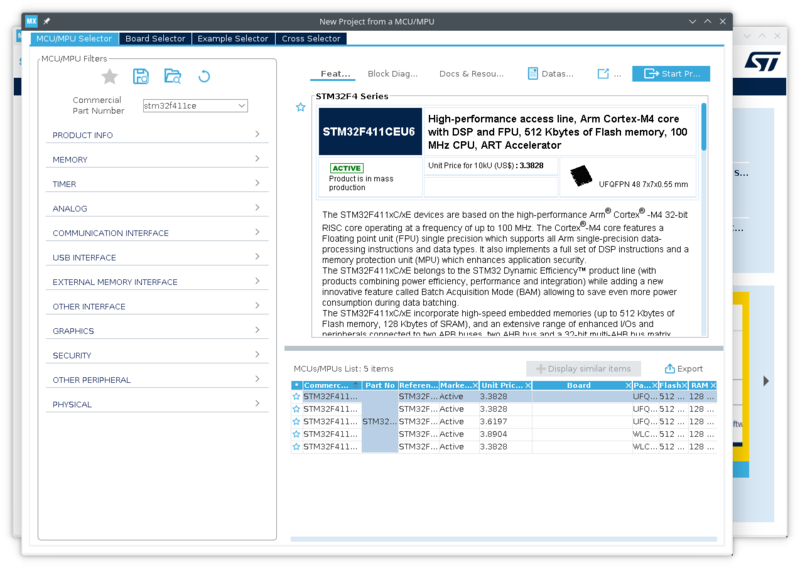
This will bring us to the MCU selector:
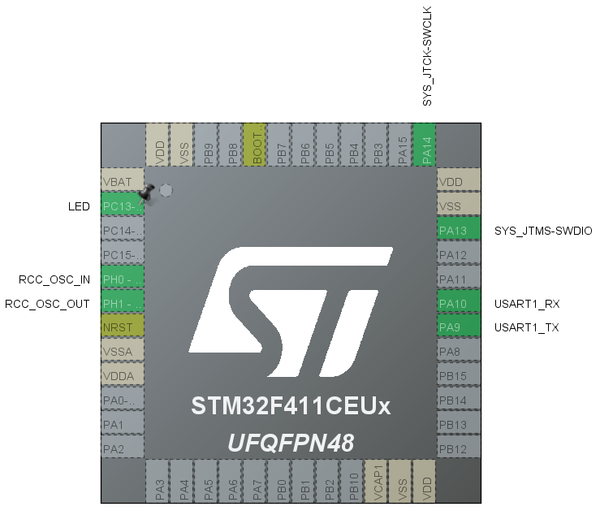
Having selected the appropriate MCU or development board, we finally end up at the core of STM32CubeMX where we can configure the MCU and it's peripherals. In our case, this being a simple "blink" project, we enable PC13 as a GPIO output (labelled LED) and USART1 for serial communications. PC13 is also configured as "Open Drain" (not overly important in this case as pulling low will work too).
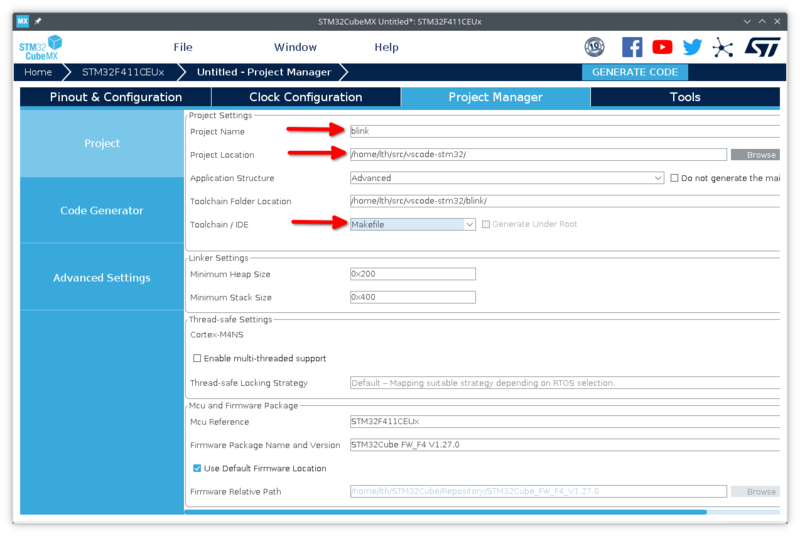
When done configuring the MCU and it's peripherals, move to the "Project Manager" tab and make a few changes:
The important ones are the Project Name, Project Location and Toolchain/IDE. When done click "Generate Code".
Notice, that it is always possible to go back and make changes in STM32CubeMX. Just start it again, load the project, make the changes and generate code again.


